
Contents
1. Control Blocks
2. Motion Blocks
3. Looks Blocks
4. Sound Blocks
5. Sensing Blocks
6. Operators
7. Variables
8. Lists
9. Pens
2. Motion Blocks
3. Looks Blocks
4. Sound Blocks
5. Sensing Blocks
6. Operators
7. Variables
8. Lists
9. Pens
1. Control Blocks
The four below are used to start a script. The "when [flag] clicked" block will execute the script when the flag, or start button, is pressed.
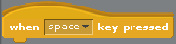
The "when space key pressed" block will execute the script when the space key (or any other key) is pressed.
The "when [Sprite 1] clicked" block will execute the script when the sprite is clicked while on the field.
The "when I receive []" block executes the script when it receives a message from a "broadcast" block.


The "wait 1 secs" below are used to wait a specified amount of time before executing the remainder of the script below the block.
The broadcast blocks send a message to all the sprites. The ''broadcast []" block will send the message and continue to execute its script. The "broadcast [] and wait" will send the message and pause until the sprites who received the message are done executing their script before continuing the script.
The "wait until <>" block will pause the script until the block in the < > field is true (see Sensing and Operators).


Repeating Blocks
The "forever" block will repeat the script inside until the project is stopped entirely.
The "repeat ( )" block will repeat the script inside the number of times inputted.
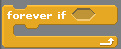
The "forever if <>" block will repeat the script as long as the block within the < > is true (see Sensing and Operators.)
The "if <>" block will execute the script inside as long as the block within the < > is true (see Sensing and Operators)
the "if <> else" block will execute the script inside the first field as long as the block within the < > is true. If it isn't it will execute the script within the second field (see Sensing and Operators).
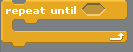
The "repeat until <>" block will execute the script until the block in the < > is true (see Sensing and Operators).
The "forever" block will repeat the script inside until the project is stopped entirely.
The "repeat ( )" block will repeat the script inside the number of times inputted.
The "forever if <>" block will repeat the script as long as the block within the < > is true (see Sensing and Operators.)
The "if <>" block will execute the script inside as long as the block within the < > is true (see Sensing and Operators)
the "if <> else" block will execute the script inside the first field as long as the block within the < > is true. If it isn't it will execute the script within the second field (see Sensing and Operators).
The "repeat until <>" block will execute the script until the block in the < > is true (see Sensing and Operators).


Ending a Script
the "stop script" block will stop the script from executing further. It cannot be built upon.
The "stop all" block will stop the entire project.
the "stop script" block will stop the script from executing further. It cannot be built upon.
The "stop all" block will stop the entire project.


2. Motion Blocks
Motion blocks allow a sprite to travel across the stage, turn around, and to set x and y positions.
The "move ( ) steps" block will make the sprite travel ( ) pixels in its current direction. You can change the direction by changing it manually (see second picture) or by the blocks (pictures 3-4). Picture 2: The three icons determine how the sprite will rotate. The highlighted one means the sprite will roll "like a can". The <-> one means that the sprite will face either left or right depending on the set angle. The • means that only the directional angle will turn, not the sprite. Picture 1: The sprite will move 10 pixels in the set direction.
The "move ( ) steps" block will make the sprite travel ( ) pixels in its current direction. You can change the direction by changing it manually (see second picture) or by the blocks (pictures 3-4). Picture 2: The three icons determine how the sprite will rotate. The highlighted one means the sprite will roll "like a can". The <-> one means that the sprite will face either left or right depending on the set angle. The • means that only the directional angle will turn, not the sprite. Picture 1: The sprite will move 10 pixels in the set direction.


The "point in direction (90) block will determine what angle the sprite will be facing, if used with the block. If you click on the arrow, four directions will pop up: up (0), down (180), left (-90), right (90). You can also type in your own angle.
The "point toward [ ]" block will determine what angle the sprite will be facing by setting the angle towards another sprite or the mouse.
The "point toward [ ]" block will determine what angle the sprite will be facing by setting the angle towards another sprite or the mouse.


The "go to x() y()" will make the sprite "jump" to the specified location on the stage. The stage is treated as an x-y grid: four quadrants, a y and x axis. You can find a position by putting your mouse to where you want the sprite to go, and at the bottom of the stage, you will see the current x- and y-positions.
The "go to [ ]" block will make the sprite "jump" another sprite or the mouse.
The "glide (secs) to x() y(): block will make a sprite "walk" over to the specified location at a desired amount of time.
The "go to [ ]" block will make the sprite "jump" another sprite or the mouse.
The "glide (secs) to x() y(): block will make a sprite "walk" over to the specified location at a desired amount of time.


You can also change the x and y positions with blocks.
The "change x by ()" will change the Sprites x position by the specified amount of pixels.
The "set x to ()" will set the Sprite's x position to the specified amount of pixels.
The "change y by ()" will change the Sprites y position by the specified amount of pixels.
The "set y to ()" will set the Sprite's y position to the specified amount of pixels.


The if on edge, bounce block will make the sprite, when touching the edges of the stage, bounce. For example, take the game PONG. Once it touches the edges, it bounces off at the same angular trajectory.
The (x- and (y-position) blocks are used as values.
The (direction) block is again used as a value. They are most commonly used in if/else scripts.
The (x- and (y-position) blocks are used as values.
The (direction) block is again used as a value. They are most commonly used in if/else scripts.


3. Looks Blocks
"Looks" Blocks are blocks that are used for how the sprite appears on the stage. This also includes a variety of effects.
Costumes
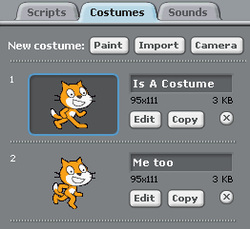
This is the Costume Board. A costume is a different version of the sprite. It is still the same sprite, but it appears to be "wearing" a different outfit, hence the name "costume". To view your costumes, rename them and edit them, click on the tab next the Scripts page. A list of all the costumes will appear. Here, you can make a new costume by painting one yourself, importing one from your computer, or, if you have a webcam, with a photo.
To rename a costume, simply click on its name and type it in.
Delete a costume by clicking on the X.
Editing a costume will open the Paint Editor for the costume.
Copy the costume to, well, copy it.
To rename a costume, simply click on its name and type it in.
Delete a costume by clicking on the X.
Editing a costume will open the Paint Editor for the costume.
Copy the costume to, well, copy it.
Blocks
The "switch to costume [costume name]" makes the sprite switch to the desired costume.
The "next costume" block makes the sprite switch the costume next on the list of costumes (see photo above).
The "(costume #)" block is used as values. Each costume has a number (see photo above). These are used commonly with Operators and if blocks.
The "next costume" block makes the sprite switch the costume next on the list of costumes (see photo above).
The "(costume #)" block is used as values. Each costume has a number (see photo above). These are used commonly with Operators and if blocks.

